
How To Setup Aws Cli
This post is about how to setup AWS Command Line Interface(CLI) on a Windows computer. It assumes that Git Bash is set up, but we could use the Windows command prompt that comes with every Windows OS. Git Bash is just highly recommended.
About AWS Command Line Interface(CLI)
From the official AWS documentation:
The AWS Command Line Interface (CLI) is a unified tool to manage your AWS services. With just one tool to download and configure, you can control multiple AWS services from the command line and automate them through scripts.
Step One: Install AWS Command Line Interface (CLI)
The official AWS documentation actually has very clear directions. For Windows, there are two ways to install AWS CLI. They’re both easy and equally good options.
When you’re done, you will be able to manage your AWS resources using Git Bash. You don’t need to use Windows Command Prompt or some other command line.
Step Two: Configure AWS CLI
Run the command aws configure in Bash.
When you type this command, the AWS CLI prompts you for four pieces of information (access key, secret access key, AWS Region, and output format), and stores them in a profile (a collection of settings) named default. This profile is then used any time you run an AWS CLI command that doesn’t explicitly specify a profile to use.
AWS Access Key and Secret Access Key
The AWS Access Key ID and AWS Secret Access Key are your AWS credentials.
You already have access keys associated with your AWS account and those keys provide root access, however, using this key is NOT recommended. It is good practice to create an IAM user with administrative privileges and use an access key associated with that user. The main reason is that you cannot reduce permissions associated with your AWS account root user unlike with IAM users. AWS provides an exhaustive list of differences in its documentations here.
If you must use your root user account…
You can find your access keys by going to your management console > navigation bar > account name > My Secret Credentials.
(Recommonded) Create IAM user with root access
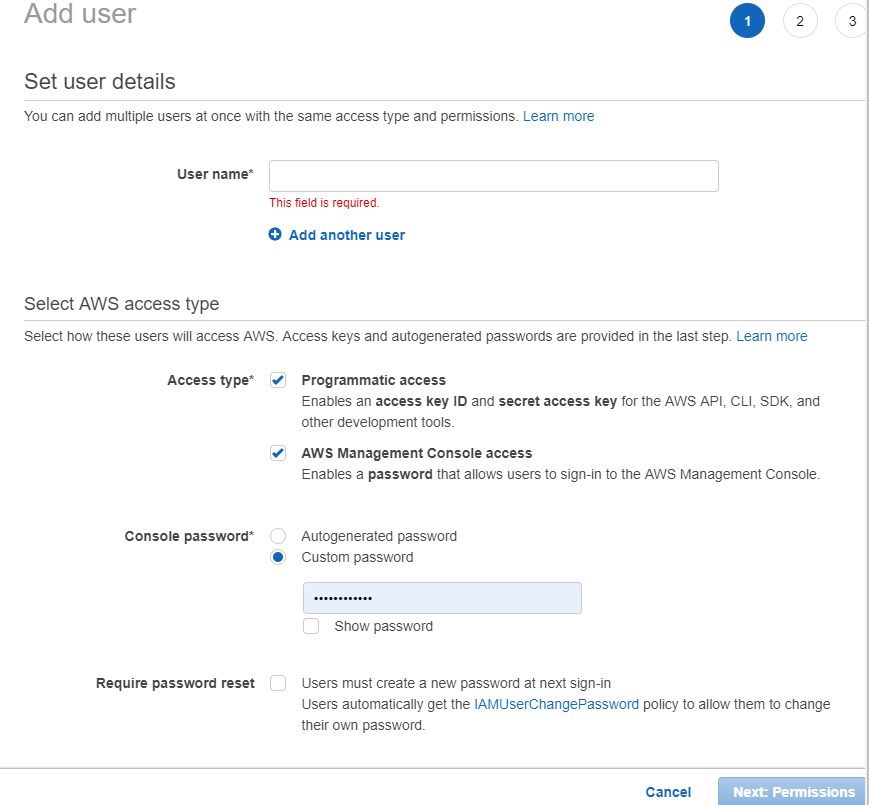
Management Console > IAM Console > Users > Add user
Choose a user name. Give this user as much access and permissions as possible. If you don’t know why you would need to restrict permissions, then you don’t need to.
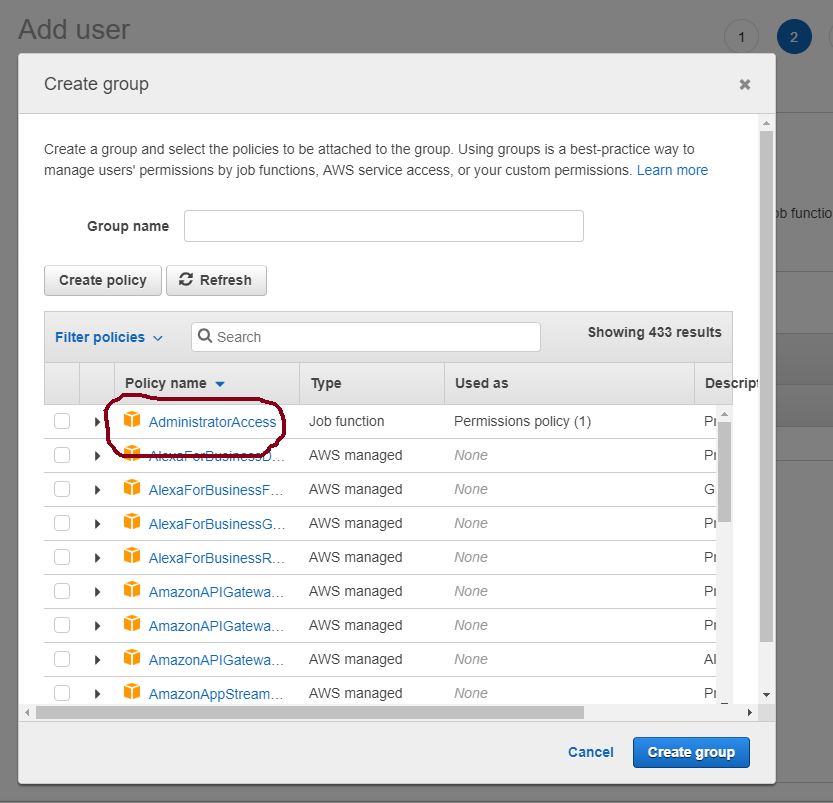
Create a group with Policy name AdministratorAccess. Click “Next: Tags”
No need to add tags. Click “Next: Review”.
Click “Create user”.
Get IAMA user Access Keys
In navigation pane of IAMA console, click “Users”. Select the user that you just created. Click “Security credentials”. Click “Create access key”.
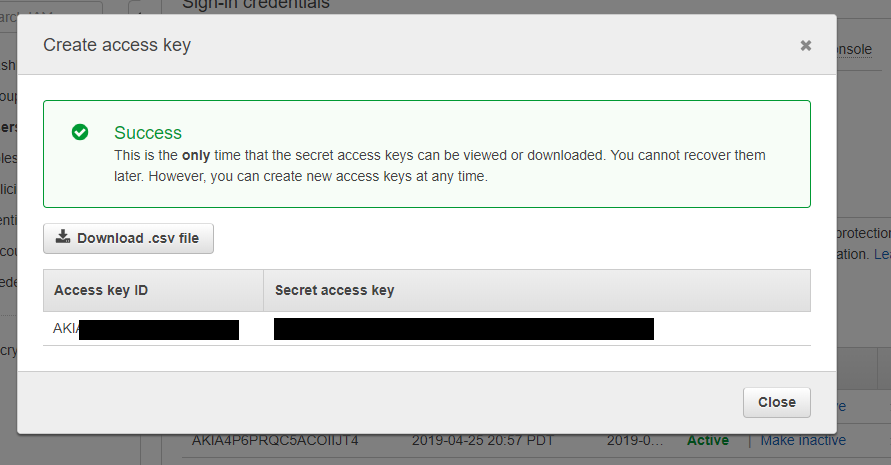
Finally, input access keys
Input your access keys.
Region Name
We already set a region. If you forgot your region, go to your management console and in the navigation pane next to your username is your region name. We set it to US West (Oregon). You need to provide the code so to speak associated with your region name which you can find here. The code for Oregon is us-west-2.
Output format
Don’t provide an output format.